It's been a while since our last Vim deep dive. I hope you took the chance and got a bit more familiar with Vim in the meantime :)
Last time we had a look at command mode as well as file and buffer management. Of course, there is a lot more to discover and we still only see the tip of the Vim-iceberg. This time we are going to learn quite a lot of small & helpful new things:
Table of contents
So let's get started - we have a lot to cover :)
If you are new here, be sure to check out the two previous articles:
DISCLAIMER: Throughout this blog post you will find some illustrational example gifs. These gifs do not visually represent the vanilla Vim experience. The appearance of the editor has been heavily modified and tailored to my personal needs. However apart from that everything shown in these gifs can be done with a vanilla Vim installation.
Furthermore some commands are very easy to type if you are using the US QWERTY keyboard layout, but might be cumbersome otherwise (e.g. if you are using a german layout).
If your are already familar with Vims configuration and are interested in what mine looks like, feel free to have a look: https://github.com/on3iro/dotfiles/blob/osx/.config/nvim/init.vim
QUICKTIPP
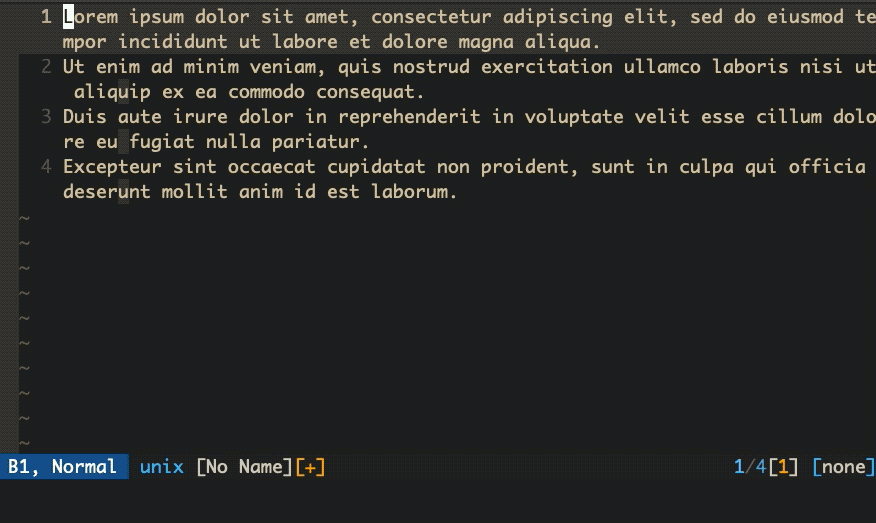
To jump to the beginning of a line press '0'.
To jump to the first text on a line press '^'.
Advanced motions and file traversal
You already know that using arrow keys inside Vim usually is a big 'No No' and that there are many powerful
shortcuts to use instead. As always, this is a soft rule of course and you are welcome to break the rules whenever you see fit. I am going to show you a few more tools to add to your 'motion toolbelt', now, which might help you to stray away from the arrow keys even more, though. You might already have encountered a few of them in vimtutor (you did do vimtutor, didn't you?), but a small refresher never hurts ;)
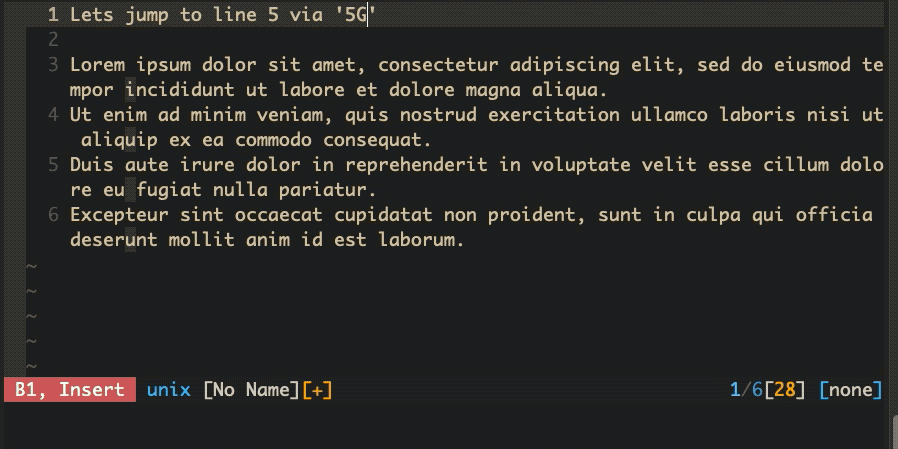
Let's start with some huge jumps inside a file (remember motions are always entered in normal mode).
To move to the start of a file just press 'gg'. To reach the bottom you need to press 'G' (shift + g).
If you would like to target a specific line number you can use either of the two commands and prepend it
with the respective line number, e.g. '12G' would put the cursor right on top of the first character of line twelve in your currently opened file.
Another great way to move forwards or backwards on a line is to use the lookup motion.
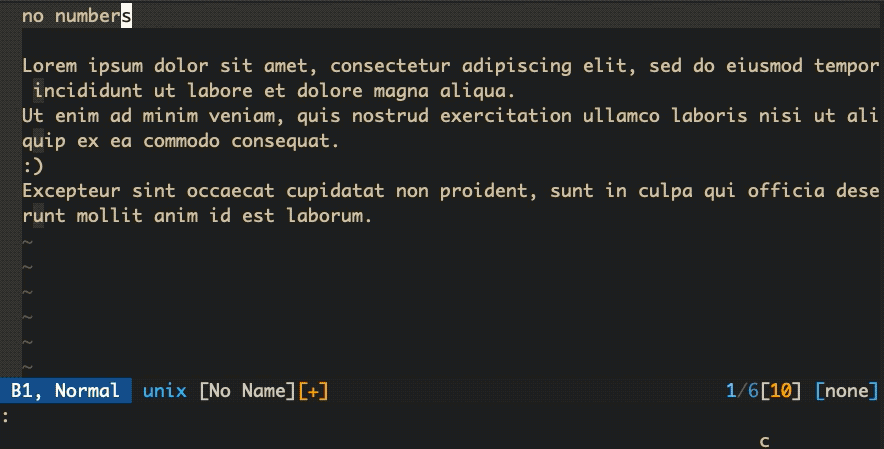
By pressing 'f' for forward search or 'F' for backward search you can jump directly to the next/previous occurence of a certain character. For example if your sentence is "How are you everybody?" and your cursor is positioned right at the start of the sentence, you could press 'fy'. This would put your cursor right at the first occurence of the letter 'y' which in this case would be the word 'you'. You can then easily step through all occurences of the respective letter by simply pressing ';' for the next and ',' for the previous occurrence.
Because this is a motion like any other you can of course combine it with operators, e.g. to delete everything up to (and including) the next occurence of a certain character.
Search inside of a file
If you are familiar with command line tools like less you probably already know what the shortcuts '?' and '/' do.
These two allow you to search for specific terms inside your file. The difference between the two is, that '/' lets you
search forwards from your current cursor position, while '?' does the same, but in the opposite direction.
Similarly to ',' and ';' you can use 'N' and 'n' to step through all matches.
QUICKTIPP
Forward search up to a certain character with 't' or backwards with 'T'.
The power of (relative) line numbers
If you watched the gifs accompanying these blog posts closely you might already have wondered why my line numbers sometimes are counted in such a strange way. This is because I usually activate relative line numbers, which means that line numbers are always counted positively in both directions (up and down) starting from my current cursor position.
This makes jumps relative from my cursor position very easy. For example if I would like to jump to the line 9 lines above my current position, I would simply press '9k'.
Of course I could simply activate regular line numbers, but this would mean that I'd have to use more keystrokes for the same motion in large files, which can be especially cumbersome when combined with operators.
Furthermore its way easier for the brain to parse a small digit number.
There are a few downsides to this, though. If you regularly do pair programming it might become harder to communicate and point out specific lines. Furthermore motions like 'j' do not count as jumps (you will soon understand what that means). Therefore it might be desirable to switch between the specific settings by using the following commands in command mode (the one you enter by pressing ':' ?)
Regular line numbering
- :set number - activate regular line numbering
- :set nonumber - deactivate regular line numbering
Relative line numbering
- :set relativenumber - activate relative line numbering
- :set norelativenumber - deactivate relative line numbering
Hybrid mode
If you activate both numbering styles you will get relative line numbering, but the line your
current cursor position is at will show its actual line number instead of a 0.
QUICKTIPP
To scroll up and down quickly press either 'CTRL+u' or 'CTRL+d'.
Visual Mode
While you could technically do almost every edit inside of vim with just motions and operators it might sometimes be easier to get a visual indication of the content you are trying to manipulate. This is where another one of Vims different modes comes into play: visual mode. The equivalent of visual mode inside a regular editor or IDE would be a simple text selection.
To enter visual mode just press 'v' inside normal mode. As soon as you enter visual mode your cursor acts as a text selection tool. You can now use all regular motions (e.g. 'j', 'k', 'h', 'l', 'gg' etc.) to select text you would like to operate on. When you are happy with the selection you made, you can use operations like 'd' to delete the selected section or 'y' to yank (copy) it.
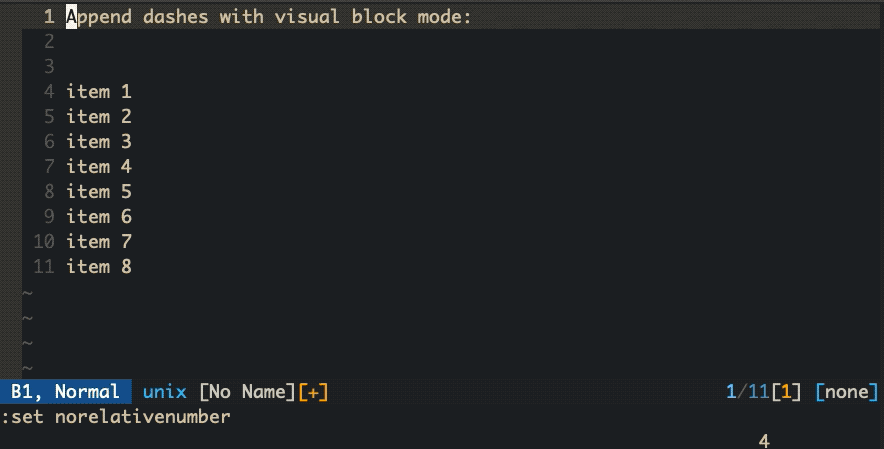
Visual Block Mode
There is another special visual mode called visual block. You can enter that mode by pressing 'ctrl+v'. Block mode lets you select blocks of text by manoeuvring the cursor vertically and horizontally. Moving the cursor vertically only selects characters inside the horizontal range you specified instead of automatically selecting all text between your
selection start and end points like it would be in regular visual mode.
This mode enables you to do some cool things. If, for example, you have a block of text items and you would like to prepend each item with a dash, you could simply vertically select the text inside visual block mode (the horizontal selection does not matter in this case). If you now enter insert mode at the beginning of the first line with 'I' (capitalized 'i'), add a dash and switch back to normal mode afterwards, each line will be prepended with a dash. (To better illustrate that behavior have a look at the gif above)
QUICKTIPP
To select text on a line instead of character basis, use 'V' instead of 'v'.
Marks and the jumplist
Marks
While this chapter caption might sound a bit like the next hot indie band we are still delving deeper into vim territory.
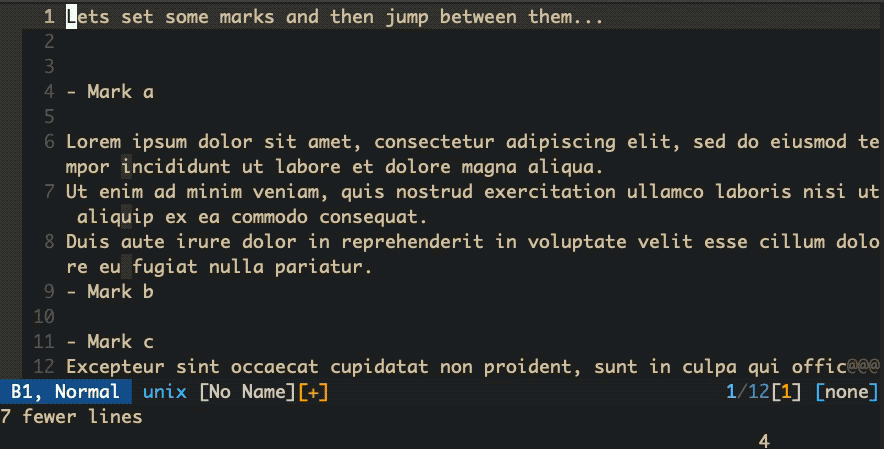
Sometimes you are editing a very specific location but want to have a look at another position inside the file, maybe make a small change and come back to the first position afterwards. This is very easily doable by using marks.
Simply type 'm<identifier>' at the cursor position you would like to save, where the identifier could be any letter. If you go to another position inside the same file and want to jump back to the specified mark, just press ''<identifier>' (note the inverted comma before the identifier!) and you will be right back where you where before. You can specify any number of marks (as long as you have letters left). A mark saves the current line the cursor is on as well as its exact column position. To quickly view all marks you have specified simply type the ':marks' command.
The jumplist
Another way to quickly traverse a file or even positions in other files you edited, is the usage of the jumplist.
All motions that count as jump:
- Jump to line - 'G', '<number>G'
- Jump to beginning of block - '[{'
- Jump to end of block - ']}'
- Jump to next blank line - '}'
- Jump to last blank line - '{'
- Jump to top of window - 'H'
- Jump to middle of window - 'M'
- Jump to bottom of window - 'L'
- Jump to beginning of sentence - '('
- Jump to end of sentence - ')'
- Jump to beginning of section - '[['
- Jump to end of section - ']]'
- Jump to matching delimiter (e.g. the opening/closing parenthesis) - '%'
- Search forwards/backwards - '/' and '?'
By using these motions instead of small motions like for example 'h', 'j', 'k', 'l' you build up a history of jumps - the so called 'jumplist'. You can view the content of your jumplist at any time by simply typing ':jumps'. By pressing either 'CTRL+O' or 'CTRL+I' you can move forwards and backwards inside your jumplist.
QUICKTIPP
To restore your last selection press 'gv'
The changelist
Even better than the jumplist (at least in my opinion) is the 'changelist'. The changelist contains a history of all changes and inputs that were made. Whenever you press 'u' or 'CTRL-R' to undo/redo changes vim will use this list for reference of what should be undone/redone behind the scenes.
This also gives us an easy way to jump to specific change positions inside a file.
Imagine the following scenario:
You are writing some text somewhere inside your file, but can't remember the spelling of a specific word you already used before. So you leave insert mode and scroll or jump to the position to look up the spelling. Now that you know how the word is spelled you would like to continue writing your text where you left off. Because of the way Vim works your cursor is now placed at a completely different line and column. The changelist to the rescue: by pressing 'g;' and 'g,' you can jump backwards and forwards inside the changelist and so you can easily jump back to your last edit.
Note: Of course there is an even easier method to rewrite a word your already used before - just start writing the word and press 'CTRL-n' until you complete the matching word.
Another note: while the jumplist works across buffers, the changelist is scoped to the specific buffer you are currently in.
QUICKTIPP
As with every motion you can prepend 'g;' and 'g,' with a number to make multiple jumps.
The best thing in vim. Period. (Quite literally)
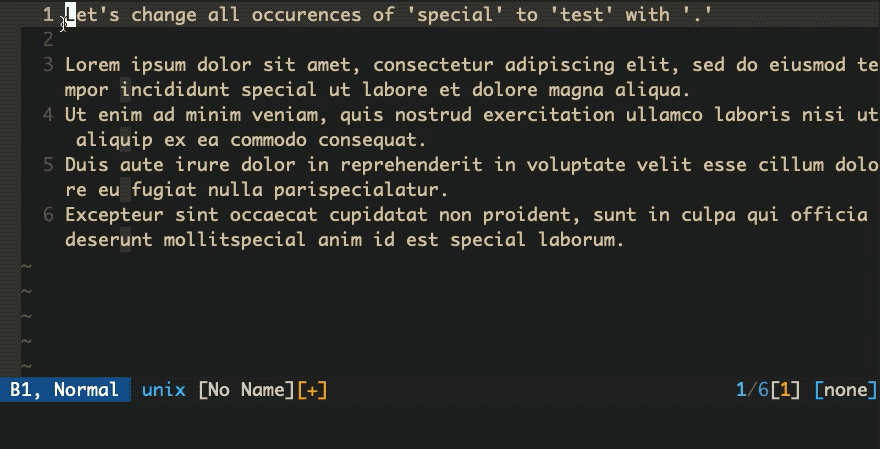
There is one particular command in Vim I can't live without anymore and that's the '.'
So what does this unimpressive looking command do, you ask? Well, it is able to repeat almost everything you can do inside vim.
Want to indent something, by selecting some text and pressing '>>' or '<<' and realize the indent level still is not quite correct? - just repeat the action by pressing '.' as often as necessary.
You just deleted a word ('dw') and realize, there are more words to delete? Just press '.' again.
You have multiple occurrences of a word you would like to change but you have the feeling that the substitute command (':s///') is not the right tool for the job? Just place your cursor at one occurence of the word and search for the next occurence with '*' (or search for it with '/'). Now type 'cgn', which translates to: 'change the selected word and go to its next occurence'. And again use the '.' command to repeat the process as often as you like.
There are lots of other situations, where the '.' command comes in handy and it will probably quickly become second nature to use ;-)
QUICKTIPP
Easily position the cursor line at the top/center/bottom of the current window by pressing 'zt','zz' or 'zb'.
Wrapping everything up
So that's a lot of stuff to digest. Remember, using Vim is not about learning and remembering everything. Just try to use a few of the mentioned commands and motions and see which ones you stick to using with your daily routine.
That said, there is still so much more to learn. Next time, I will show you how you can use macros to easily repeat very complex operations. We will also have a look at registers as well as digraphs.
So until next time - happy viming :)