At sandstorm|media, we use a wide array of software tools to run our operations. We try to keep our
working environments synchronized to prevent these nasty “But it works on my machine!” issues. That's
why we're using Ansible to configure the software on our Macs.
While they save us a lot of time in day-to-day business, we do need to configure and test our Ansible
scripts from time to time. It's sensible to do that in a virtualized environment, since reinstalling
OSX everytime you want to test something is not very practical.
Getting OSX 10.10 Yosemite to run inside a VirtualBox is a tad tricky, which is why I describe the
steps how to do it here. This tutorial assumes that the host system is an OSX machine as well.
Step 1: Obtain The Installer File
To get OSX running in a virtual machine, you need a bootable ISO first. The simplest source of one
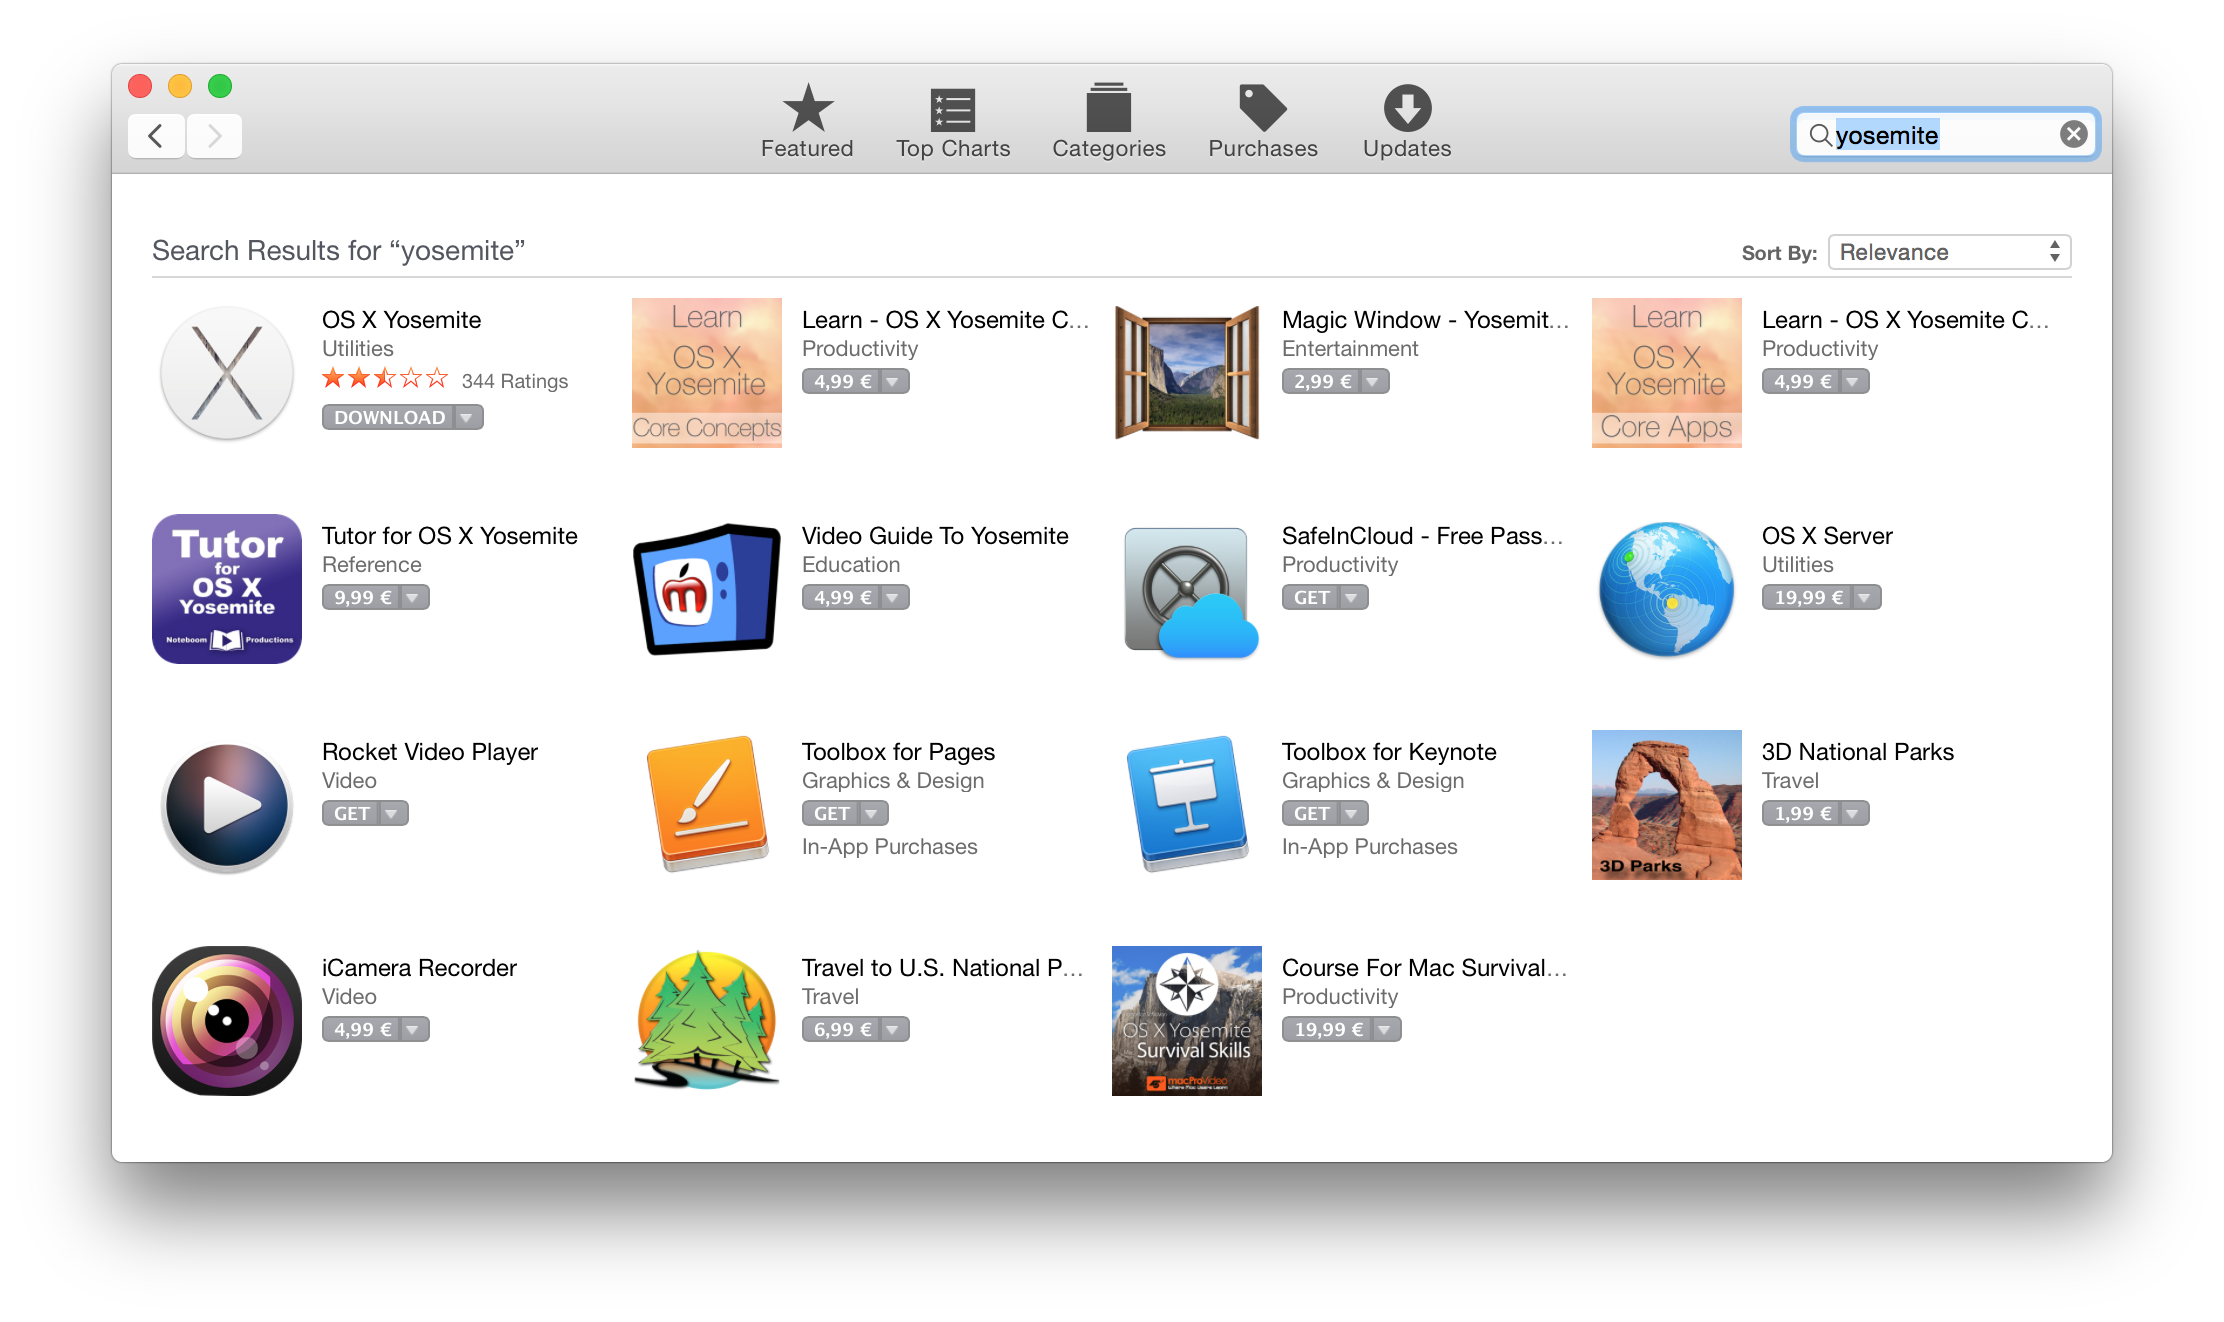
is in fact the Mac App Store (assuming you're running Yosemite already). Just search for
“Yosemite” and you will be presented with the option to download the installer.
Start the 6GB download. Once that has finished, it's time for:
Step 2: Create A Bootable Yosemite ISO
The installer file, called “Install OSX Yosemite.app”, should now be available in your
“Applications” folder. We want to extract the actual image file to create a bootable ISO from that.
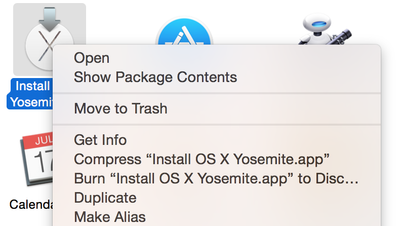
Right-click the installer file and click “Show Package Contents”.
In the resulting screen, open “Contents > SharedSupport” and locate the “InstallESD.dmg” file.
Save that to a separate folder, as it's the one we will continue working with.
The image file we extracted just now is not bootable yet. To do that, we need to run a few
operations with the Disk Utility on it. This is most conveniently done via a shell script. Copy the
following code (thanks to Jhon Quintero), paste it in a file named “createISO.sh” and place this file
in the same folder that you copied the “InstallESD.dmg” file to. Make it executable via “chmod +x
createISO.sh” and run it.
# HOWTO: Create bootable OS X 10.10 Yosemite ISO
# ORIGINAL INSTRUCTIONS (OS X Mavericks): http://forums.appleinsider.com/t/159955/howto-create-bootable-mavericks-iso

# MOUNT THE INSTALLER IMAGE
hdiutil attach ~/Downloads/Install\ OS\ X\ Yosemite.app/Contents/SharedSupport/InstallESD.dmg -noverify -nobrowse -mountpoint /Volumes/install_app

# CONVERT THE BOOT IMAGE TO A SPARSE BUNDLE
hdiutil convert /Volumes/install_app/BaseSystem.dmg -format UDSP -o /tmp/Yosemite

# INCREASE THE SPARSE BUNDLE CAPACITY TO ACCOMMODATE THE PACKAGES
hdiutil resize -size 8g /tmp/Yosemite.sparseimage

# MOUNT THE SPARSE BUNDLE FOR PACKAGE ADDITION
hdiutil attach /tmp/Yosemite.sparseimage -noverify -nobrowse -mountpoint /Volumes/install_build

# REMOVE PACKAGE LINK AND REPLACE WITH ACTUAL FILES
rm /Volumes/install_build/System/Installation/Packages
cp -rp /Volumes/install_app/Packages /Volumes/install_build/System/Installation/

# COPY THIS TWO FILES (It is the solution for the common error - The operation couldn't be completed. Undefined error: 0)
cp /Volumes/install_app/BaseSystem.chunklist /Volumes/install_build/BaseSystem.chunklist
cp /Volumes/install_app/BaseSystem.dmg /Volumes/install_build/BaseSystem.dmg

# UNMOUNT THE INSTALLER IMAGE
hdiutil detach /Volumes/install_app

# UNMOUNT THE SPARSE BUNDLE
hdiutil detach /Volumes/install_build

# RESIZE THE PARTITION IN THE SPARSE BUNDLE TO REMOVE ANY FREE SPACE
hdiutil resize -size `hdiutil resize -limits /tmp/Yosemite.sparseimage | tail -n 1 | awk '{ print $1 }'`b /tmp/Yosemite.sparseimage

# CONVERT THE SPARSE BUNDLE TO ISO/CD MASTER
hdiutil convert /tmp/Yosemite.sparseimage -format UDTO -o /tmp/Yosemite

# REMOVE THE SPARSE BUNDLE
rm /tmp/Yosemite.sparseimage

# RENAME THE ISO AND MOVE IT TO THE DESKTOP
mv /tmp/Yosemite.cdr ~/Desktop/OS X 10.10 Developer Preview 1.iso

# TESTED WITH:
# VMware Fusion 6.0.3 (1747349)
# VirtualBox 4.3.12 r93733
If everything went well, you'll now have a bootable image file called “Yosemite1010.iso” in your
folder. This is what we'll now use to create the VM.
Step 3: Create a VM with the ISO
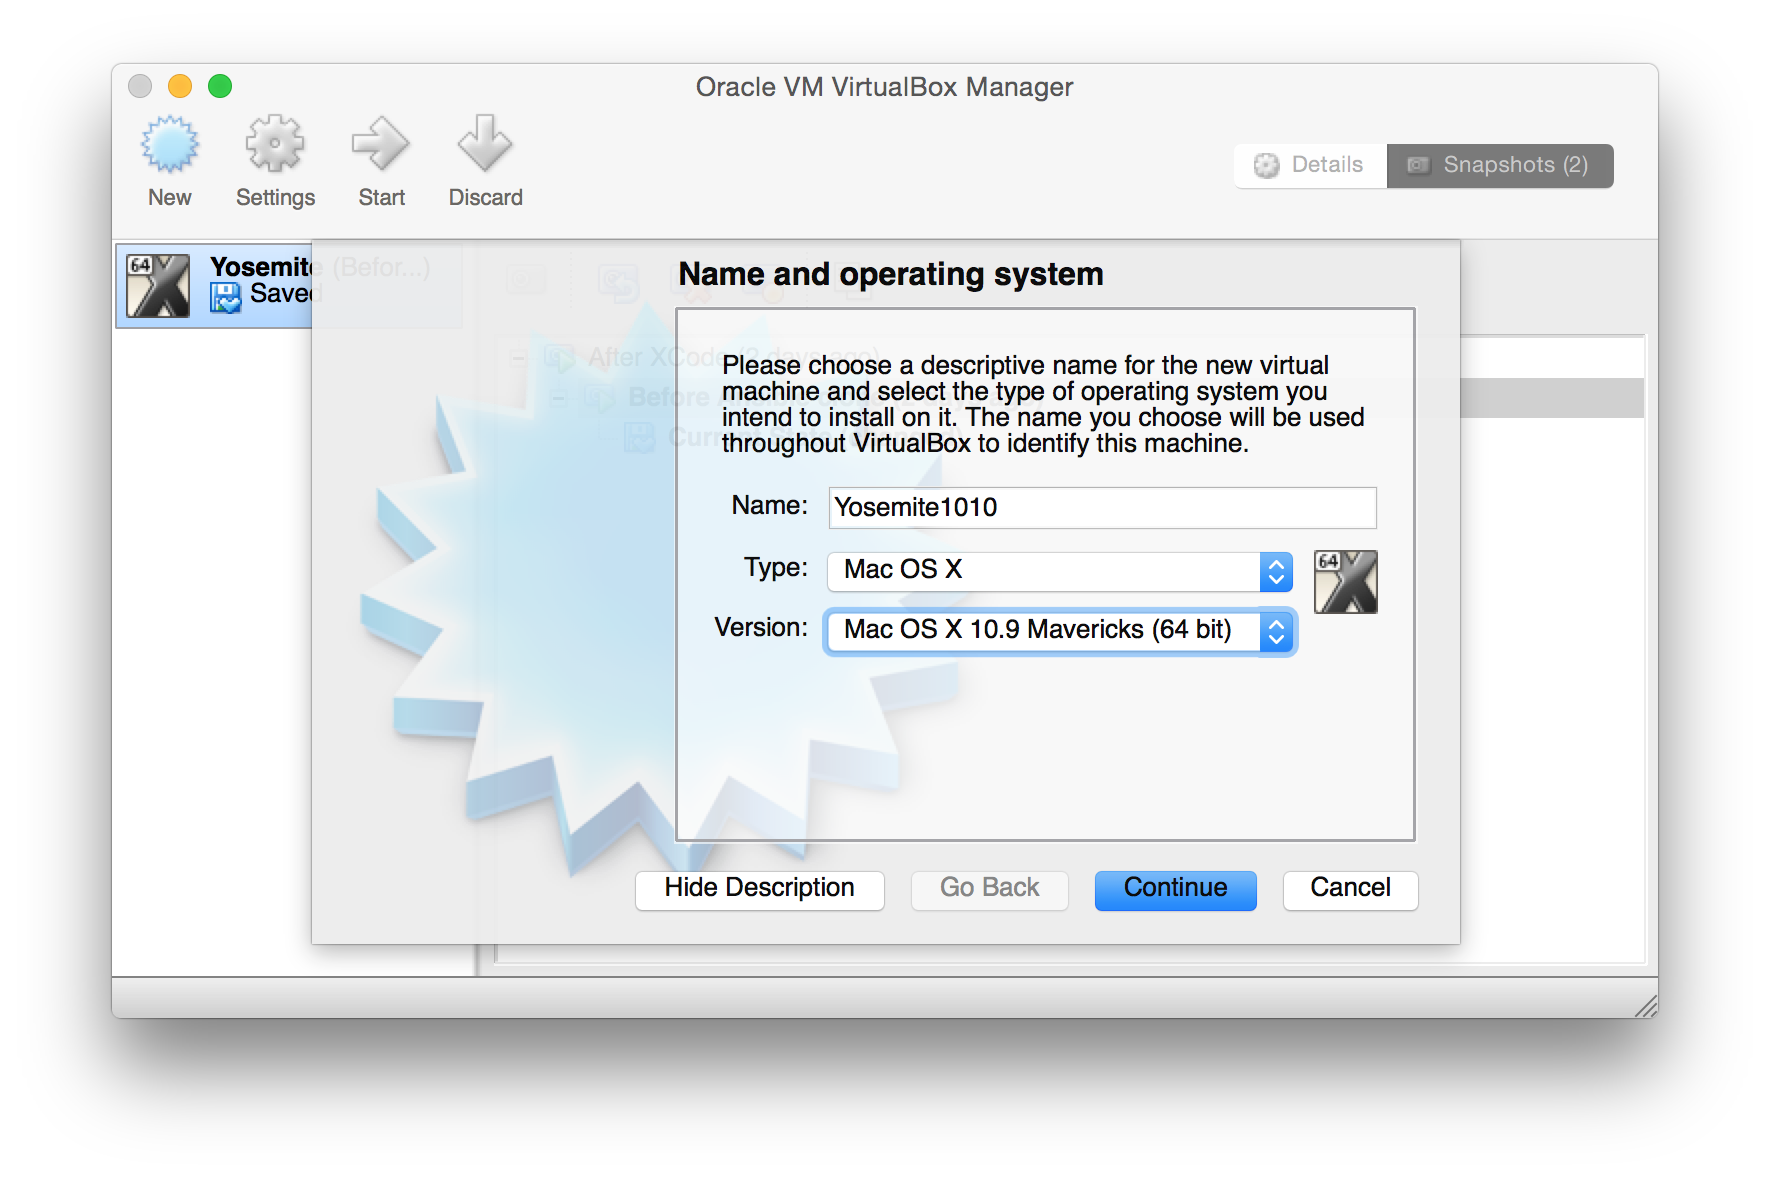
Fire up VirtualBox and create a new VM. Select Mac OS X as the operating system and 10.9 as the
version (it'll work with 10.10, too).
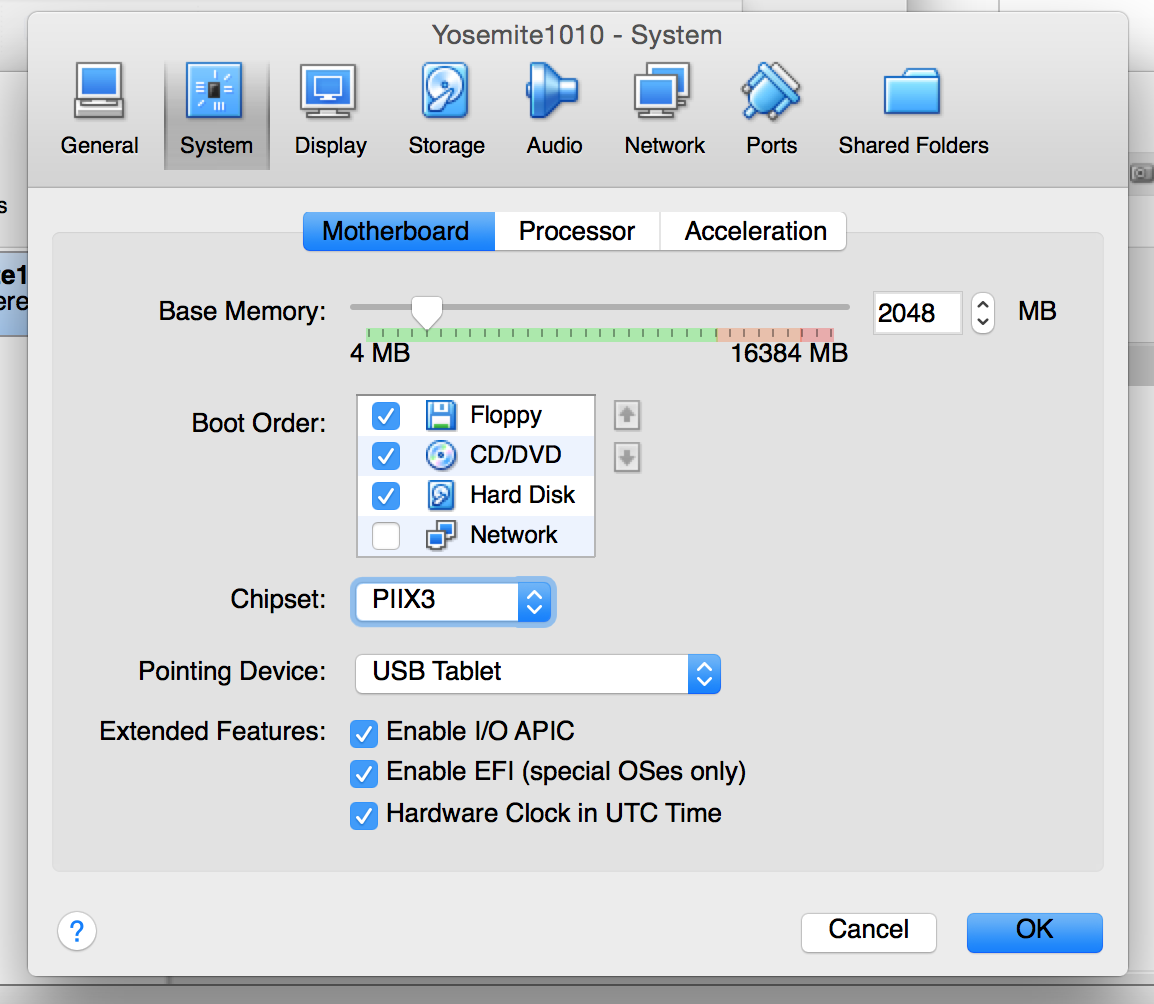
Leave all the settings as default, and make sure you make the virtual disk big enough. After the VM
is created, access its settings and change to the “System” tab. Select “PIIX3” as the chipset.
After that, there's one more thing to do if you're running a recent (2014 or later) MacBook. On the
new Haswell cores, OSX tries to use a chipset feature that does not work within VirtualBox. This
will result in an error message ("Missing Bluetooth Controller Transport") during the boot process (more information can be found in a
VirtualBox ticket on the issue). As a workaround, we will make the VM believe it's running on an
older processor by changing the processor identification with the vboxmanage command:
vboxmanage modifyvm Yosemite --cpuidset 1 00206a7 02100800 1fbae3bf bfebfbff
After that is done, your VM should be good to go. Fire it up and after a while, you'll hopefully be presented with the welcome screen. Happy VM-ing!
Any comments or additions? Let us know on Twitter!


